Apple 14pro Customized Ring Tone Settings
It is very complicated to set a custom ring tone for incoming calls on the Apple 14pro. You can't set it directly through the music app. You also need the library band app. Xiao Bian brings you the setting method of customized incoming call ring tones in Apple 14pro here today. If you want to know how to set customized incoming call ring tones in Apple 14pro, don't miss it.
Apple 14pro customized ringing tone setting method
1. First download and install the Library Band App and Cool Dog Ringing Tone on your iPhone. You can also search ringtone keywords and download other ringtone apps. (Other music software can also be used)
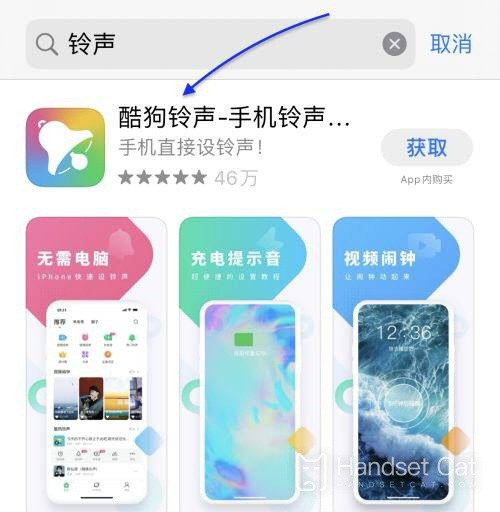
2. Open the Cool Dog Ringing Tone App, select any song you like, and click [Set Ringing Tone].
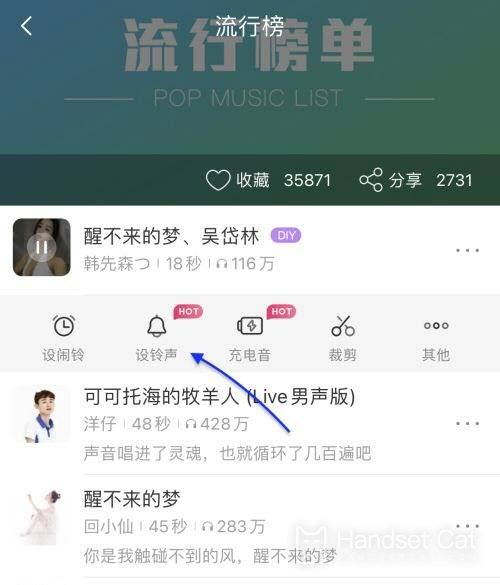
3. In the pop-up option box, click the [Library Band] icon to continue. If Library Band is not installed on your phone, iPhone will prompt you to install it.
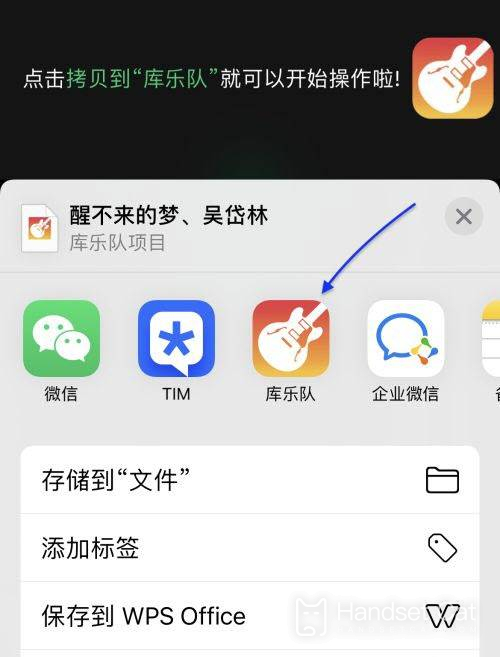
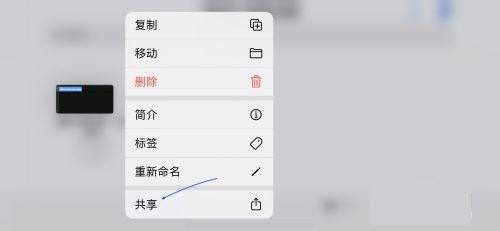
4. iPhone will copy and import the ringtones into the library band. Find the ringtone in the library band and long press it, then select Share in the dialog box that pops up.
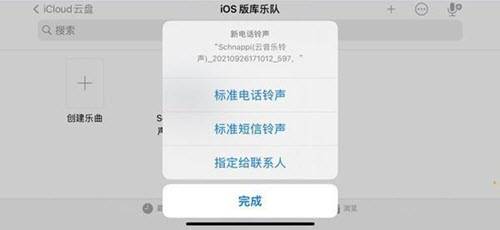
5. Select [Phone Ringing], and then click [Export] to continue. After the ring tone is successfully exported, click [Use the sound as...], and then select the [Standard phone ring tone] option.
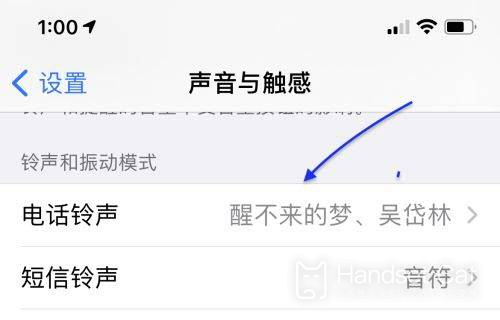
6. Finally, enter the iPhone [Sound and Touch] settings, click [Phone Ringing Tone], find the created ringing tone and select [Settings].
The way to set a custom ring tone for incoming calls on Apple 14Pro is to edit the above method. At present, this method is the fastest and most convenient. If you need to set a personalized ring tone for your phone, then follow the tutorial to try it.