IPhone 13 Image Watermarking Tutorial
As the latest model of Apple's iPhone series, the iPhone 13 has a comprehensive upgrade compared with the previous generation, and this small compilation brings you how to add your favorite watermark to your pictures using the iPhone 13. Come and have a look.

How do I add a watermark to my iPhone 13? IPhone 13 Watermarking Tutorial
1. Find [Quick Command] on the desktop and open it.
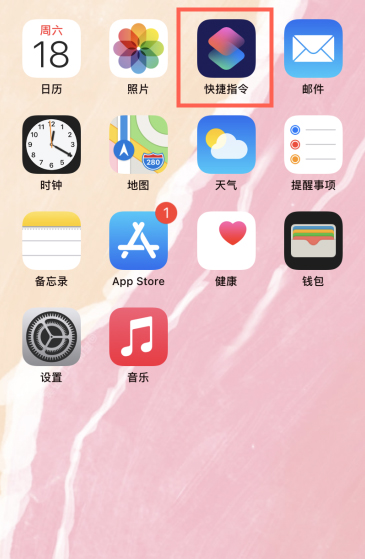
2. Select [iPhone13 Watermark] in all shortcut commands

Click [Select Photo] or [Take Photo]
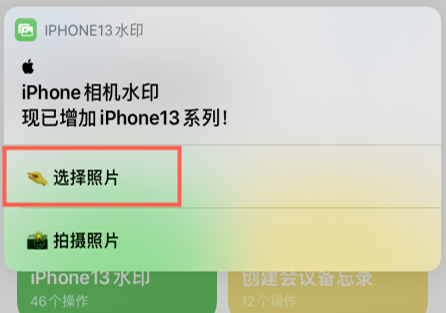
4. Select an image you want to add the iPhone 13 watermark to. Take Cook's photo as an example.

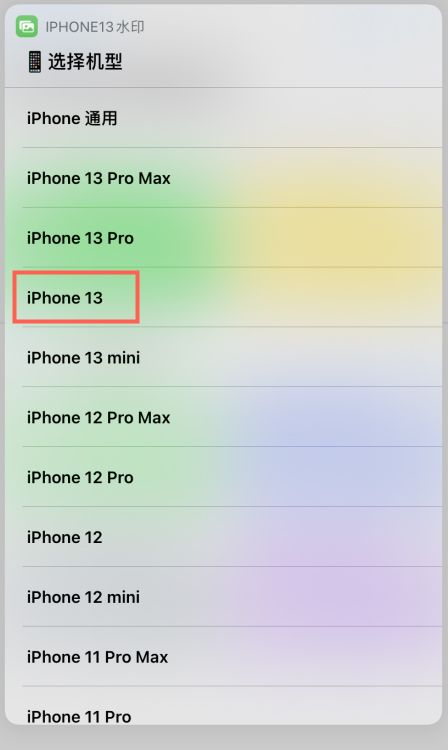
5. Select [iPhone13] model
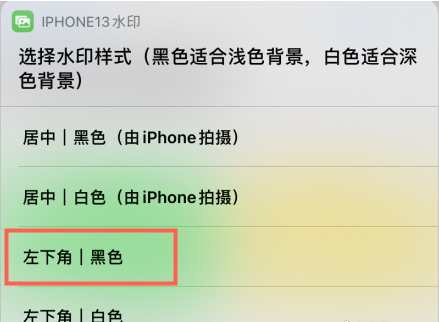
6. Select the watermark style, black is suitable for light background, white is suitable for dark background, take black as an example.
7. Add a watermark and click Finish.

8. Appears“ ✔” Status, that is, it has been saved to the album.

9. At this point, you can view the photo album, and you can see the picture that the "iPhone13 13 Watermark" was successfully added.
The above is about how to add watermark to iPhone 13. Is it very easy and practical?, Get your iPhone 13 and try it. If this article is helpful to you, remember to pay attention.