How to set the floating ball on the iPad 9
The hoverball is a very famous feature of the iPad 9 mobile phone, and there are many built-in functions. For example, the default screenshot method is to press the phone power button and any volume button at the same time to capture the screen, but with the hoverball, you can rely on the hoverball screenshot. The first time you receive the iPad 9, you may not know how to set the floating ball on the iPad 9. The editor has sorted out the specific answers below. Let's see!
How to set the floating ball on ipad9
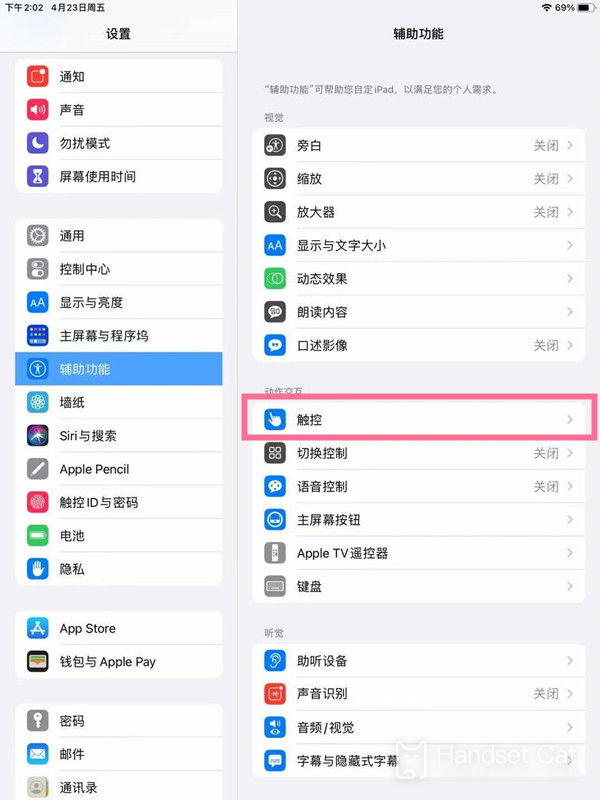
1. Click to open the [Touch] option in the auxiliary function setting.
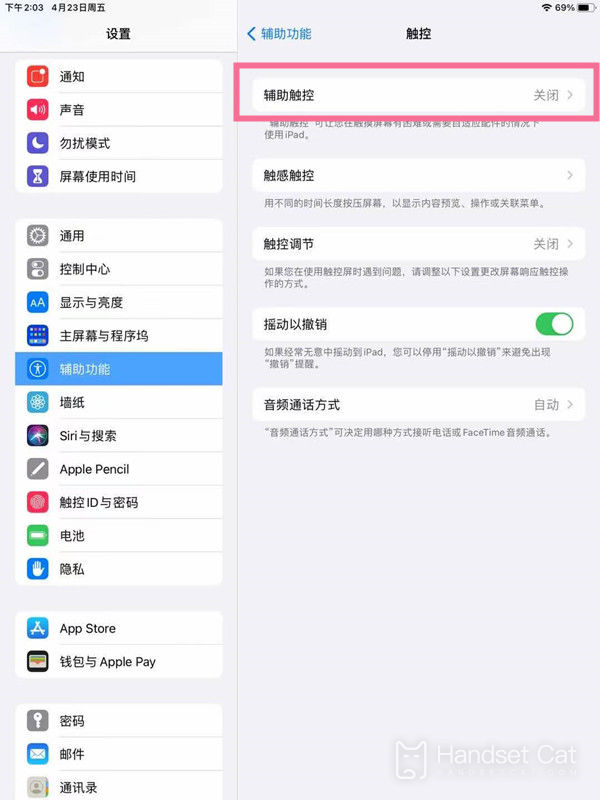
2. Click [Auxiliary Touch].
3. Turn on the switch on the right side of [auxiliary touch].
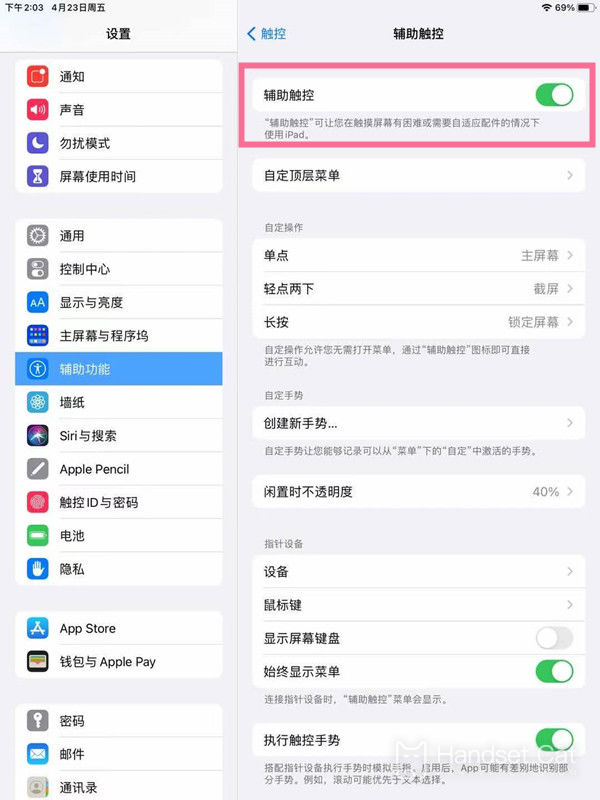
Turn on the auxiliary function in the phone setting interface, select touch, turn on auxiliary touch, and then display the floating ball on the screen. It is relatively simple to operate. The floating ball setting of the iPad 9 is the same as that of other iPad tablets. If you are an old iPad user, you should know how to do it.