How does the Redmi K50 Pro screen capture?
Now screenshots on mobile phones are as fast and convenient as screenshots on computers. You can save mobile phone images without any cumbersome operations. Different mobile phones have different screenshots. Today's mini editor brings the screenshots tutorial of Redmi K50 Pro. There are many different ways for you to learn.
Redmi K50 Pro Quick Screenshot Tutorial, Redmi K50 Pro Screenshot Mode Introduction
I. The MIUI system has its own screenshots
The built-in screenshot function of MIUI is very convenient. At present, there are two screenshots,
① Press the menu key+volume down key at the same time in any picture, and the screen capture is completed after the mimic shutter picture flashes,
② In any picture, slide your finger down the edge of the taskbar, pull out the eleven button menu, click the screen capture button, and after the ten button menu is automatically retracted, the screen capture is completed after the shutter like picture flashes.
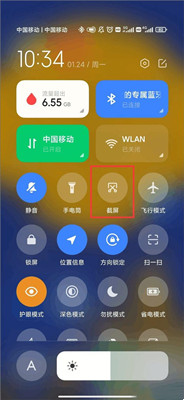
II. Screen capture of special gestures
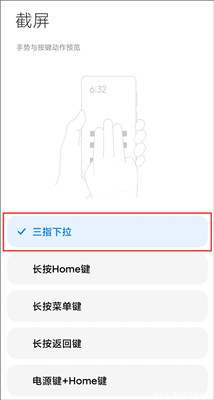
Three finger screenshot
Screenshot can also be completed by swiping the screen with three fingers. Some mobile phones need to be set actively. The three finger setting steps are as follows:
Step 1. Enter [Settings] on the mobile desktop;
Step 2. Click "More Settings";
Step 3. Click "Key Shortcut" to enter the function shortcut key setting of "Screenshot";
Step 4. Three finger screenshots can be set here!
Of course, you can also set your favorite screen capture mode:
After reading the above tutorial, you should have learned the screen capture method of Redmi K50 Pro. Isn't it very simple? In this way, when you want to capture the screen, you can easily capture the phone screen, save it on your phone or share it with your friends. If you think this tutorial is useful, please like it.